The only things needed are pictures, background images, paper, and Adobe Photoshop.
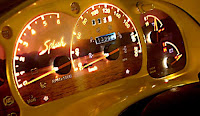
At the same time installing the new templates you could also change the back lighting for your factory gauges. It is fairly simple to do and gives your vehicle a unique look!
Step 2 - Once you've completed this step, scan them at a minimum of 300dpi in a Photoshop compatible program.
Step 3 - You will need to separate the image and have the background (figure 1) on one layer and the numbers and "dummy lights" on the other (figure 2). You can customize the second layer to your specifications, eg. font, size, angles, outlines....etc. Both layers need to be transparent.
Figure 1
Figure 2
 Figure 3
 Figure 4
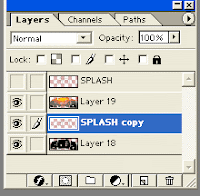
Step 5 - To make a copy of the "dummy" lights and numbers layer, click on the layer from the "layers window" then press on ALT + L and choose "duplicate layer". Move the copied layer between the black and pictured gauges. (Figure 5)
 Figure 5
Step 6 - Merge the first two layers.
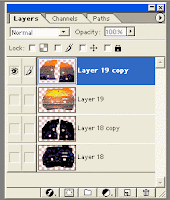
Step 7 - To select the shine-through colour at night, click your "dummy lights" in the layer window and Ctrl + Left click to select. On the black gauges layer, use the "bucket" to fill in desired colour to shine through. Trash the copy layer. (Figure 6)
Figure 6
Step 8 - Make a copy of each layer.
Step 9 - Make the image fit on a standard page. (Figure 7)
 Figure 7
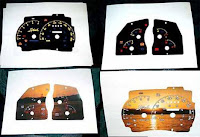
Step 10 - Print each layer on regular white paper. (Figure 8) (Warning: with regular white paper, some light will shine through parts you don't want light to shine through. You get used to it though)
 Figure 8
Step 11 - Cut out the images and glue the black behind the coloured. Align using a bright light behind them. Use ordinary wood glue and press in a heavy book overnight.
Step 12 - Reverse step 1 to install back into vehicle.


No comments:
Post a Comment